Troubleshooting Common Issues with Heat Pump Water Heaters

heat pump water heater

Heat pump water heaters are an efficient way to heat water in your home. They work by transferring heat from the air to the water, using less energy than traditional water heaters. Despite their efficiency, these systems can experience issues that affect their performance and reliability.

Understanding how heat pump water heaters work and identifying common problems can help you maintain your system. Knowing some basic troubleshooting steps can also save you time and money. However, it’s important to recognize when an issue requires professional attention.

Proper maintenance ensures the longevity and efficiency of your heat pump water heater. This guide will help you navigate common issues and understand when to call for expert help. By being proactive, you can keep your water heater functioning at its best.

Understanding How Heat Pump Water Heaters Work

Basic Components and Operation

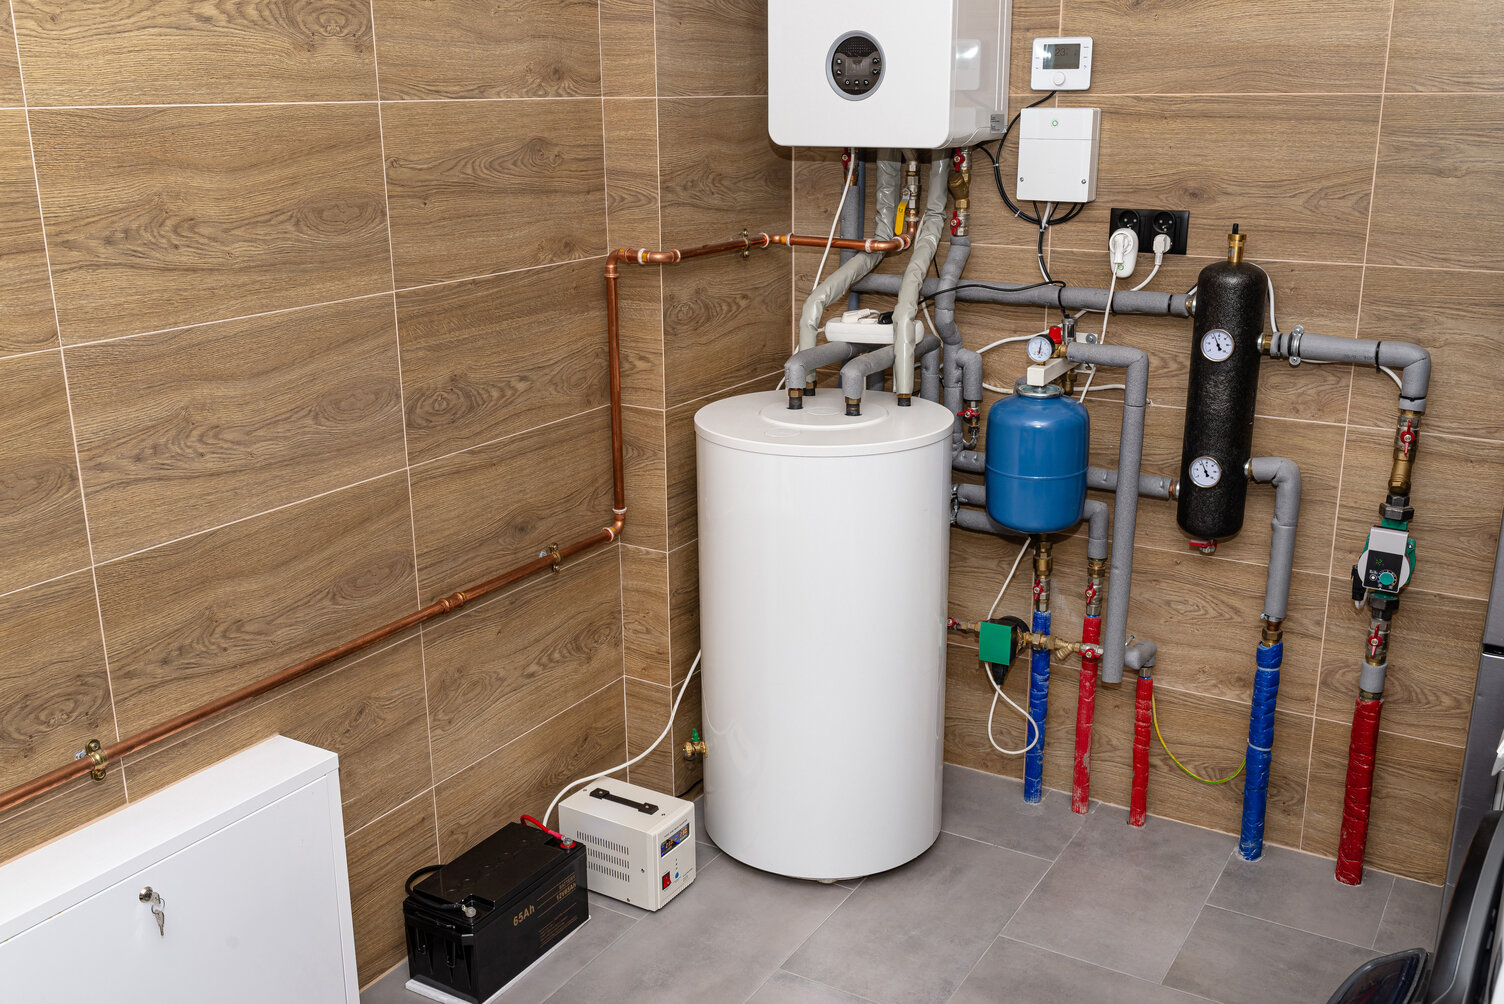
Heat pump water heaters consist of a few key components: a compressor, a condenser, an evaporator, and a fan. The system works by extracting heat from the surrounding air and transferring it to the water in the tank. The evaporator absorbs heat from the air, the compressor increases the temperature, and the condenser transfers this heat to the water. This cycle repeats until the water reaches the desired temperature.

Learning about these components helps us understand their operation. The fan moves air over the evaporator to capture heat. The refrigerant circulates within the system, moving through the compressor and condenser. The heated refrigerant transfers energy to the water, making this process efficient and effective.

Energy Efficiency and Benefits

One of the main advantages of heat pump water heaters is their energy efficiency. They use less electricity than traditional water heaters by leveraging ambient air heat. This method can save money on electricity bills while reducing the environmental impact.

In addition to being energy-efficient, these systems offer other benefits. They can operate in various climates and provide consistent hot water. Also, heat pump water heaters often include advanced features like programmable thermostats and diagnostic displays, which make them convenient and user-friendly. Overall, they are a cost-effective and eco-friendly choice for many households.

Identifying Common Problems

No Hot Water

One common issue with heat pump water heaters is the absence of hot water. Several factors can cause this problem, such as a tripped circuit breaker, a malfunctioning thermostat, or a problem with the heating element. Checking these components can help identify the source of the issue and restore hot water.

Strange Noises

Strange noises coming from the heat pump water heater can be unsettling. These sounds might indicate problems like loose components, debris in the fan, or issues with the compressor. Listen carefully to the type and location of the noise to diagnose the cause accurately.

Error Codes on the Display

Modern heat pump water heaters often display error codes to help identify problems. If an error code appears, consult the user manual to understand its meaning. Common codes may indicate issues with sensors, refrigerant levels, or airflow. Knowing these codes can guide you toward the appropriate troubleshooting steps or the need for professional assistance.

DIY Troubleshooting Steps

Checking Power Supply

One of the first steps in troubleshooting a heat pump water heater is to check the power supply. Ensure that the unit is properly plugged in and that the circuit breaker hasn’t tripped. Sometimes a simple reset of the breaker can resolve the issue. Verify that all electrical connections are secure and that the unit is receiving the correct voltage. Addressing power supply issues can often solve minor problems and get your heater back up and running.

Inspecting Air Filters

Air filters play a crucial role in the efficient operation of heat pump water heaters. Over time, filters can become clogged with dust and debris, restricting airflow and hindering performance. Inspect the air filters regularly and clean or replace them as needed. A clean filter ensures proper airflow and can improve the efficiency of the water heater. Keeping filters clean is a simple yet effective way to maintain your system.

Cleaning the Condenser Coils

Condenser coils are another essential component that requires regular maintenance. Dirty coils can reduce efficiency and cause the unit to work harder than necessary. Turn off the power supply before cleaning the coils. Use a soft brush or vacuum cleaner to remove dirt and debris from the coils. Ensure the area around the heater is clear of obstructions to promote good airflow. Keeping the condenser coils clean helps maintain optimal performance and extends the life of your heat pump water heater.

When to Call Our Professionals

Complex Electrical Issues

If you encounter complex electrical issues during your troubleshooting, it’s best to call our professionals. Handling electrical problems requires specialized knowledge and skills to ensure safety. Complex issues like persistent tripping of the circuit breaker, faulty wiring, or malfunctioning electrical components should be addressed by our technicians. They have the expertise to diagnose and repair these problems safely and effectively, avoiding potential hazards.

Persistent Performance Problems

Sometimes, heat pump water heaters may exhibit persistent performance problems despite your best efforts. Issues like inconsistent water temperature, frequent error codes, or unusual noises that cannot be resolved through basic troubleshooting may indicate deeper issues. Our professionals can conduct a thorough inspection to identify and fix the root cause of these problems. Their experience and equipment ensure that your heater is restored to optimal functioning.

Scheduling Service with Our Professionals

For reliable and professional service, consider scheduling an appointment with D&F Plumbing, Heating and Cooling. Our technicians are trained to handle all aspects of heat pump water heater maintenance and repair. They will provide a comprehensive assessment and offer solutions tailored to your needs. Booking a service with us ensures that your water heater receives the expert care it deserves. Contact us to schedule a convenient service appointment and keep your heat pump water heater running smoothly.

Conclusion

Troubleshooting heat pump water heaters involves understanding the components, identifying common problems, and taking steps to resolve issues. While some maintenance tasks can be performed by homeowners, others require professional expertise. Recognizing when to call our professionals ensures safety and efficient operation. Proper care and timely repairs enhance the longevity and performance of your heat pump water heater.

Don’t let unresolved issues compromise your comfort. For expert assistance and reliable service, contact D&F Plumbing, Heating and Cooling. Our skilled technicians are ready to help you maintain and repair your heat pump water heater in Forest Grove. Schedule an appointment today and enjoy consistent, energy-efficient hot water in your home!

Heat Pump Installation: What to Expect and How to Prepare

heat pump installation

Installing a heat pump in your home is a wise investment that can provide efficient heating and cooling throughout the year. However, many homeowners may feel unsure about the process and what it involves. Knowing what to expect and how to prepare can make the installation smoother and more efficient.

Understanding Heat Pump Installation

Types of Heat Pumps

When considering a heat pump installation, it’s important to understand the different types available. The three main types are air-source, ground-source (geothermal), and water-source heat pumps.

  1. Air-Source Heat Pumps: These are the most common. They transfer heat between your house and the outside air. They are efficient and suitable for a wide range of climates.
  2. Ground-Source Heat Pumps: Also known as geothermal heat pumps, these systems transfer heat between your home and the ground. They are highly efficient but usually involve a more complex and costly installation process.
  3. Water-Source Heat Pumps: These systems use water as the heat exchange medium. They are often used in properties near a body of water.

Knowing the type of heat pump that best fits your needs can save you time and ensure you get the most suitable system for your home.

Components Involved

Understanding the components involved in a heat pump system can help you better prepare and maintain your setup.

  1. Outdoor Unit: This unit contains the compressor and is placed outside the house.
  2. Indoor Unit: Also known as the air handler, this unit distributes air inside your home.
  3. Refrigerant Lines: These lines connect the indoor and outdoor units and carry the refrigerant.
  4. Thermostat: This device controls the temperature settings of the system.
  5. Ductwork (if applicable): Some systems may require ductwork to distribute air throughout the home.

Familiarizing yourself with these components will help you understand the installation process and what our professionals will be handling.

Preparing Your Home for Installation

Choosing the Right Location

Selecting the proper location for both the indoor and outdoor units is crucial for optimal performance.

  1. Outdoor Unit Placement: The outdoor unit should be placed on a flat, stable surface such as a concrete pad. Ensure it’s away from windows to reduce noise disturbances. Also, it should have enough clearance around it for airflow.
  2. Indoor Unit Placement: The indoor unit should be installed in an area that allows efficient air distribution. Common locations include basements, attics, or utility closets. Make sure the location is easily accessible for future maintenance.

Clearing the Area

Preparing the installation area helps expedite the process and ensures the safety of our technicians.

  1. Clear Outdoor Space: Remove any debris, plants, or objects from the area where the outdoor unit will be placed. Ensure there is easy access to the location.
  2. Clear Indoor Space: Move any furniture or obstructions that might hinder the installation of the indoor unit and ductwork. Ensure that pathways are clear so that our professionals can move equipment in and out quickly.
  3. Access to Power Supply: Ensure that there is a reliable power supply close to the installation area for both the indoor and outdoor units. Having a predetermined power source will make the installation smoother.

By preparing the area properly, you can facilitate a quicker and more efficient heat pump installation, minimizing disruption to your daily routine.

What to Expect During Installation Day

Arrival of Technicians

On the installation day, our professionals will arrive at your home at the scheduled time. The first step involves a quick assessment of the installation areas. They will check both the indoor and outdoor locations to ensure everything is ready. Any final adjustments or preparations will be made before the installation begins.

Step-by-Step Installation Process

  1. Setting Up the Outdoor Unit: The technicians will position the outdoor unit on the pre-cleared area. They will secure it on a stable base to ensure it remains level and performs optimally.
  2. Installing the Indoor Unit: The indoor unit will be placed in the predetermined location. The technicians will make sure it is in a spot that allows good air distribution and easy access for future maintenance.
  3. Connecting Refrigerant Lines: The next step involves running the refrigerant lines between the indoor and outdoor units. Our professionals ensure the lines are properly insulated and securely connected.
  4. Electrical Connections: Proper electrical connections are crucial for the functioning of the heat pump. Our technicians will connect the system to your home’s power supply, making sure all connections adhere to safety standards.
  5. Testing the System: Once everything is in place, the system will be thoroughly tested. The technicians will check for leaks, ensure the refrigerant levels are correct, and verify that the system is operating efficiently.

This step-by-step process ensures that your heat pump installation is done correctly, providing reliable heating and cooling for your home.

Post-Installation Tips and Maintenance

Checking the System

After the installation is complete, our technicians will give you a brief overview of the system’s features and how to operate it. They will demonstrate the thermostat controls and explain how to switch between heating and cooling modes. This is also a good time to ask any questions you may have about the system. Ensuring you know how to operate your new heat pump is essential for maintaining its efficiency.

Scheduling Regular Maintenance

To keep your heat pump running efficiently, regular maintenance is crucial. Here are a few maintenance tips:

  1. Regular Filter Changes: Replace or clean the filters every few months to ensure optimal airflow and prevent strain on the system.
  2. Annual Professional Checkups: Schedule annual maintenance with our professionals. They will inspect and tune up the system, checking for any potential issues before they become serious problems.
  3. Monitor the Outdoor Unit: Keep the area around the outdoor unit clear of debris, leaves, and other obstructions. Regularly check the unit to ensure it is clean and free from blockages.

These simple maintenance steps can help extend the life of your heat pump and ensure it operates efficiently year-round.

Conclusion

A heat pump installation is an excellent way to improve your home’s heating and cooling efficiency. By understanding the different types of heat pumps available, preparing your home properly, and knowing what to expect on installation day, you can make the process smoother and stress-free. Following post-installation tips and scheduling regular maintenance will ensure that your system continues to function optimally for years to come.

For a seamless and professional heat pump installation in Oregon City, OR, trust D&F Plumbing, Heating and Cooling. Our experienced technicians are here to guide you every step of the way. Contact us today to schedule your installation and enjoy reliable heating and cooling in your home.

How to Effectively Unclog Drains: The Importance of Professional Drain Snaking

drain cleaning

Dealing with clogged drains can be a frustrating experience for homeowners. Whether it’s a slow-draining sink or a completely blocked shower drain, these problems can disrupt your daily routine and cause significant inconvenience. Understanding the common causes of drain clogs and the best methods for addressing them is essential for maintaining a functional plumbing system.

Common Causes of Drain Clogs

Hair and Soap Scum

One of the most common causes of drain clogs is hair combined with soap scum. This is especially true in bathroom sinks, tubs, and showers. As you wash your hair, strands naturally fall out and make their way into the drain. These hair strands can easily catch on the interior surfaces of the pipes and combine with soap scum to create a blockage. Over time, this buildup can restrict the flow of water, leading to slow drainage or complete clogs.

Food Waste and Grease

In kitchen sinks, food waste and grease are the primary culprits behind clogs. Even if you have a garbage disposal, certain types of food waste like coffee grounds, eggshells, and fibrous vegetables can cause blockages. Additionally, pouring grease or oil down the drain can solidify and trap other debris, creating a stubborn clog. It’s essential to dispose of food waste and grease properly to prevent these common issues.

Foreign Objects

Foreign objects finding their way into the drains can lead to significant clogs as well. Items like toys, sanitary products, and paper towels should never be flushed down toilets or discarded in sinks. These objects do not break down easily and can cause immediate blockages or accumulate over time, leading to severe clogs. It’s crucial to educate everyone in the household about what can and cannot go down the drains to avoid these problems.

DIY Methods for Unclogging Drains

Using a Plunger

A plunger is one of the most accessible tools for unclogging drains and can be used for sinks, tubs, and toilets. To use a plunger effectively:

  1. Ensure Enough Water: Fill the basin with enough water to cover the plunger’s cup.
  2. Position the Plunger: Place the plunger over the drain, creating a tight seal.
  3. Plunge Firmly: Push and pull the plunger vigorously for 15-20 seconds.
  4. Check the Drain: Remove the plunger and see if the water drains away. Repeat the process if necessary.

Baking Soda and Vinegar

Baking soda and vinegar are a natural solution for tackling minor clogs. Here’s how to use them:

  1. Remove Standing Water: Clear the sink or tub of any standing water.
  2. Add Baking Soda: Pour about a cup of baking soda directly into the drain.
  3. Add Vinegar: Pour an equal amount of vinegar into the drain. You’ll notice it fizzing as it reacts with the baking soda.
  4. Wait and Flush: Let the mixture sit for about 15 minutes, then flush with hot water to clear the clog.

Hot Water and Dish Soap

Hot water and dish soap can be effective for clogs caused by grease and oil. Follow these steps:

  1. Boil Water: Heat a pot of water until boiling.
  2. Add Dish Soap: Pour a generous amount of dish soap directly into the clogged drain.
  3. Flush with Hot Water: Slowly pour the boiling water down the drain. The hot water and soap will help break down the grease and clear the clog.

These DIY methods can be effective for minor clogs, but they may not always provide a permanent solution. For more stubborn blockages, professional drain snaking is often the best option.

The Benefits of Professional Drain Snaking

Effective and Thorough Cleaning

One of the main benefits of professional drain snaking is the effective and thorough cleaning it provides. Our professionals use specialized equipment designed to tackle even the toughest clogs. The snake can reach deep into the plumbing system, breaking up and removing debris that DIY methods might not touch. This thorough cleaning ensures that your drains are entirely free of obstructions, preventing future clogs and ensuring smooth water flow.

Safe for Your Pipes

Another significant advantage of professional drain snaking is its safety for your pipes. Unlike harsh chemical cleaners that can corrode and damage pipes, snaking is a mechanical process. Our technicians carefully insert and navigate the snake, targeting the clog without harming your plumbing system. This method is ideal for maintaining the integrity of both older and newer plumbing systems, providing an effective solution without risking damage.

Quick and Reliable Results

Professional drain snaking offers quick and reliable results. Our technicians can identify the source of the clog and resolve it efficiently. This prompt service minimizes downtime and inconvenience, allowing you to get back to your daily activities without prolonged disruption. Moreover, the reliability of professional drain snaking means you can count on the problem being effectively resolved, reducing the likelihood of recurring issues.

Why Choose Us for Drain Snaking

Experienced Technicians

Choosing us for your drain snaking needs ensures you benefit from the expertise of our experienced technicians. Our team is highly trained and knowledgeable in all aspects of plumbing and drain cleaning. They are equipped to handle various types of clogs, ensuring effective and efficient service. With years of experience, our professionals can quickly diagnose the problem and provide the best solution.

State-of-the-Art Equipment

We use state-of-the-art equipment for all our drain snaking services. Our advanced tools are designed to handle even the most stubborn clogs. By using the latest technology, we ensure that the job is done correctly the first time. This high-quality equipment allows us to provide superior service, ensuring your drains are cleaned thoroughly and efficiently.

Customer Satisfaction Guaranteed

Our commitment to customer satisfaction sets us apart. We prioritize your needs and strive to exceed your expectations. From the moment you contact us to the completion of the service, we focus on providing a seamless and satisfying experience. Our technicians are courteous, professional, and dedicated to solving your drainage issues. We stand by our work, offering a satisfaction guarantee for all our services.

Conclusion

Maintaining clear and functional drains is essential for a smooth-running household. Understanding the common causes of drain clogs and attempting DIY methods can offer temporary relief, but for a permanent solution, professional drain snaking is the way to go. It ensures effective and thorough cleaning, safe practices for your pipes, and quick, reliable results.

For those in need of a reliable solution to persistent drain issues, trust D&F Plumbing, Heating and Cooling. Our experienced technicians, state-of-the-art equipment, and commitment to customer satisfaction make us the ideal choice for all your needs regarding drain snaking in Tigard, OR. Contact us today to schedule your service and experience the difference professional care can make.

Ductless Air Conditioning Maintenance Tips for Summer

ductless maintenance

Ductless air conditioning systems are an excellent choice for maintaining a comfortable home environment, especially during the sweltering summer months. They offer efficient cooling without the need for elaborate ductwork. However, like any other cooling system, ductless air conditioners require regular maintenance to function at their best.

Why Regular Maintenance is Crucial for Your Ductless Air Conditioning

Importance of Preventive Maintenance

Preventive maintenance for your ductless air conditioning is essential. It ensures your system runs smoothly and efficiently throughout the summer. Regular upkeep helps identify potential issues before they become significant problems. This proactive approach can save you from inconvenient breakdowns during the hottest days of the year.

By regularly maintaining your system, you can improve its performance and energy efficiency. Clean and well-maintained units do not have to work as hard to cool your home, which can reduce your energy consumption. This not only helps keep your home comfortable but also extends the lifespan of your unit.

Benefits of Regular Check-Ups

Regular check-ups offer numerous benefits for your ductless air conditioning system. These include:

  1. Improved Efficiency: Regular maintenance helps keep components clean and well-functioning, which boosts the efficiency of your system.
  2. Extended Lifespan: By addressing minor issues early, you can prevent them from escalating into major problems, thus extending the life of your unit.
  3. Better Air Quality: Clean filters and components mean better air quality inside your home, reducing the likelihood of allergens and pollutants.
  4. Reduced Costs: Preventive maintenance can save you money by avoiding costly repairs and lower energy bills due to an efficiently running system.

Scheduling regular maintenance checks ensures that your ductless air conditioning operates optimally, providing reliable comfort throughout the summer season.

Cleaning and Replacing Air Filters

How to Clean or Replace Filters

Cleaning or replacing air filters is one of the simplest yet most important maintenance tasks for ductless air conditioning systems. Here are the steps to follow:

  1. Turn Off the Unit: Always turn off the system before performing any maintenance.
  2. Access the Filters: Open the front panel of the indoor unit to locate the filters.
  3. Remove the Filters: Slide the filters out gently.
  4. Clean the Filters: If the filters are washable, rinse them under lukewarm water and let them dry completely before reinserting. If they are disposable, replace them with new ones.
  5. Reinsert the Filters: Once clean and dry, slide the filters back into place and close the front panel.

How Often to Perform Filter Maintenance

Regular filter maintenance is crucial for the efficiency and longevity of your ductless air conditioning system. The frequency of cleaning or replacing depends on several factors, such as usage and indoor air quality. As a general rule:

  1. Monthly Checks: During peak usage periods like summer, check and clean or replace the filters monthly.
  2. Bi-Monthly Checks: In periods of less frequent use, inspecting and cleaning the filters every two months should suffice.
  3. Special Circumstances: If you have pets or live in an area with high pollen or dust levels, you may need to perform filter maintenance more frequently.

Routine filter maintenance ensures that your ductless air conditioning system functions efficiently, providing the best possible air quality and performance.

Inspecting and Cleaning the Outdoor Unit

Steps for Cleaning the Outdoor Unit

Proper maintenance of the outdoor unit is essential for the overall performance of your ductless air conditioning system. Here are the steps to follow:

  1. Turn Off the Unit: Always turn off the system and disconnect the power supply before starting.
  2. Clear Debris: Remove leaves, twigs, and other debris from around the unit to ensure proper airflow.
  3. Clean the Fins: Use a garden hose to gently clean the fins, being careful not to bend them. Use a fin comb for any bent fins.
  4. Check the Coils: Inspect the coils for dirt and grime. Clean them using a coil cleaner to ensure efficient heat exchange.
  5. Inspect the Surroundings: Ensure that there are no plants or objects within at least two feet of the unit, allowing for proper ventilation.

Common Issues to Look For

When inspecting your outdoor unit, be on the lookout for these common issues:

  1. Blocked Airflow: Debris and dirt can block airflow, reducing efficiency and increasing the risk of overheating.
  2. Damaged Fins or Coils: Bent fins or damaged coils can compromise the unit’s efficiency and should be addressed immediately.
  3. Unusual Noise: Listen for any unusual noises that could indicate a problem with the fan or other components.
  4. Wear and Tear: Check for signs of wear and tear on the unit, including the fan blades and wiring.

Regular inspection and cleaning of the outdoor unit help ensure your ductless air conditioning system runs smoothly and efficiently. Addressing these common issues promptly can prevent more significant problems down the line.

Scheduling Professional Maintenance Services

Benefits of Professional Maintenance

Scheduling professional maintenance for your ductless air conditioning offers numerous benefits:

  1. Expertise and Knowledge: Our professionals have the expertise to identify and address issues that may not be apparent to the average homeowner.
  2. Comprehensive Service: Technicians provide a thorough inspection and servicing, covering aspects you might overlook.
  3. Increased Efficiency: Regular professional maintenance helps keep your system running at peak efficiency, lowering your energy bills.
  4. Extended Lifespan: Professional care can extend the life of your ductless air conditioning system, providing a better return on your investment.

What to Expect During a Professional Service Visit

During a professional service visit, our technicians will perform a series of tasks to ensure your ductless air conditioning system is in optimal condition:

  1. System Inspection: A comprehensive inspection of both indoor and outdoor units to identify any issues.
  2. Cleaning Components: Cleaning of essential components such as filters, coils, and fins to ensure efficient operation.
  3. Checking Refrigerant Levels: Ensuring the refrigerant is at the correct level and looking for any signs of leaks.
  4. Testing and Calibration: Checking the system’s thermostat and controls to ensure they are working correctly and fine-tuning them for optimal performance.

Regular professional maintenance ensures your ductless air conditioning system operates efficiently and reliably, providing you with comfort and peace of mind.

Conclusion

Maintaining your ductless air conditioning system is crucial for ensuring it operates at peak efficiency during the demanding summer months. Regular preventive maintenance, including cleaning and replacing air filters, inspecting and cleaning the outdoor unit, and scheduling professional maintenance services, can extend the life of your system and improve its performance. By taking these steps, you can avoid costly repairs, improve indoor air quality, and ensure a comfortable living environment.

If you’re ready to ensure your ductless air conditioning system is in top shape for the summer, trust the experts at D&F Plumbing, Heating and Cooling. Our experienced technicians are here to provide comprehensive AC maintenance in Portland, OR, that keep your system running smoothly. Contact us today to schedule your service and enjoy a cool, comfortable summer.

Signs Your Ductless AC Needs Immediate Attention

ductless ac

Ductless AC systems offer reliable and efficient cooling for homes, providing comfort without the need for extensive ductwork. However, like all mechanical systems, they require regular maintenance and attention to function properly. Ignoring warning signs can lead to larger problems and costly repairs.

Unusual Noises from Your Ductless AC

Types of Noises to Watch For

Your ductless AC should operate quietly. If you start hearing unusual noises, it might be a sign that something is wrong. Common noises to watch for include:

  1. Buzzing: This could indicate electrical problems or an issue with the fan motor.
  2. Clicking: While it’s normal to hear clicks when the system turns on or off, continuous clicking might signal a problem with the relay or thermostat.
  3. Hissing: This noise often points to a refrigerant leak, which needs immediate attention.
  4. Grinding: This is usually a sign of a serious issue, like a problem with the compressor or motor bearings.

Being aware of these sounds can help you identify problems before they become severe, ensuring your system remains efficient and effective.

Potential Causes of Unusual Noises

Understanding what may cause these noises can help in diagnosing the problem. Common causes include:

  1. Fan Issues: Dirt or debris caught in the fan can create a buzzing or grinding noise.
  2. Electrical Problems: Faulty wiring or a malfunctioning capacitor might cause buzzing or clicking sounds.
  3. Worn-Out Components: Over time, parts like bearings and belts can wear out, leading to grinding or squealing noises.
  4. Refrigerant Leaks: Hissing can indicate a refrigerant leak, which not only affects performance but can also lead to more extensive damage.

Recognizing the potential causes behind these noises will help you address the issues promptly, ensuring your ductless AC remains in good working condition.

Reduced Cooling Efficiency

Signs of Poor Cooling Performance

When your ductless AC isn’t cooling as effectively as it used to, it’s a clear sign that something is wrong. Signs of poor cooling performance include:

  1. Inconsistent Temperatures: Some rooms may be cooler or warmer than others.
  2. Longer Cooling Times: If your system takes longer to cool your home, it’s likely struggling.
  3. Constantly Running Unit: If the AC runs continuously without reaching the desired temperature, it’s a sign of inefficiency.

Monitoring these symptoms can help you identify when your ductless AC needs attention, preventing further issues.

Common Issues Affecting Cooling Efficiency

Several factors can affect your ductless AC’s cooling efficiency. Common issues include:

  1. Dirty Filters: Clogged filters restrict airflow, making it harder for the system to cool your home.
  2. Refrigerant Levels: Low refrigerant levels can significantly reduce cooling efficiency and may indicate a leak.
  3. Blocked Vents: Obstructions in or around the vents can hinder airflow, affecting the system’s ability to cool efficiently.
  4. Thermostat Problems: A malfunctioning thermostat can prevent your system from maintaining the set temperature.

Addressing these common issues promptly can help restore your ductless AC’s efficiency and ensure your home remains comfortable during the warm months.

Leaking or Excess Moisture

Indicators of Moisture Problems

Moisture problems in your ductless AC can manifest in various ways. Here are some indicators to watch for:

  1. Water Stains: Look for water stains on walls or ceilings near the indoor unit.
  2. Mold Growth: Mold or mildew around the unit can indicate a moisture issue.
  3. Unusual Puddles: Puddles forming under the indoor unit are a clear sign of a leak.
  4. Musty Odors: A musty or damp smell can indicate excess moisture or mold growth within the system.

Recognizing these signs early can help you address moisture problems before they cause further damage to your home or system.

Possible Reasons for Leaks

Leaks or excess moisture in your ductless AC can occur for several reasons. Understanding the potential causes can help you pinpoint the issue:

  1. Clogged Drain Line: When the condensate drain line is clogged, it can cause water to back up and leak.
  2. Improper Installation: Poor installation can lead to issues with drainage, causing water to leak around the unit.
  3. Frozen Evaporator Coils: When coils freeze and then thaw, they can create excess water that the system can’t manage.
  4. Faulty Pump: If the condensate pump fails, it won’t be able to move water out of the system, leading to leaks.

Addressing these issues promptly ensures that your ductless AC operates efficiently and without leaks.

When to Contact Us for Help

Benefits of Professional Diagnosis and Repair

When your ductless AC shows signs of trouble, professional diagnosis and repair offer significant benefits:

  1. Accurate Diagnosis: Our professionals can accurately identify the root cause of the problem, ensuring the right repair.
  2. Quick Solutions: Experienced technicians can fix issues quickly, minimizing downtime and discomfort.
  3. Preventive Measures: Regular maintenance by our professionals can help prevent future problems, prolonging the life of your system.
  4. Reliable Repairs: Professional repairs ensure that issues are resolved correctly, reducing the likelihood of recurring problems.

Opting for professional diagnosis and repair ensures that your ductless AC is in good hands, maintaining its performance and efficiency.

How Our Technicians Ensure Efficient Operation

Our technicians follow a meticulous process to ensure your ductless AC operates efficiently:

  1. Thorough Inspection: We start with a comprehensive inspection to identify any issues and ensure the system is clean and functional.
  2. Precise Repairs: Following the inspection, we perform precise repairs to address any identified problems, ensuring reliable operation.
  3. Performance Testing: After repairs, we conduct rigorous testing to ensure your ductless AC is operating at peak efficiency.
  4. Maintenance Recommendations: Our technicians provide maintenance tips and recommendations to help you keep your system in top condition.

By following these steps, we ensure your ductless AC remains efficient and effective, providing you with reliable comfort throughout the year.

Conclusion

Recognizing the signs that your ductless AC needs immediate attention can save you from costly repairs and ensure your home remains comfortable. Whether it’s unusual noises, reduced cooling efficiency, or leaking moisture, addressing these issues promptly is crucial. Ensuring your ductless AC is in top condition requires vigilance and timely action.

Don’t wait until you notice severe warning signs with your ductless AC in Lake Oswego, OR. Contact the experienced team at D&F Plumbing, Heating and Cooling for professional diagnosis and repair. Our skilled technicians are dedicated to keeping your system running efficiently, ensuring your home stays comfortable all year round. Reach out to us today for expert assistance and reliable service.

What to Do When Your Water Heater Leaks: Immediate Steps to Take

leaks

A leaking water heater can cause significant damage to your home if not addressed quickly. Recognizing the signs of a leak and taking immediate action can prevent more extensive damage. Understanding how to detect a leak, perform quick fixes, and seek professional help ensures your home stays safe and dry.

Identify the Source of the Leak

Common Areas for Water Heater Leaks

Finding the source of a water heater leak can help you address the issue more effectively. Here are common areas where leaks may occur:

  1. Valves: Check the temperature and pressure relief valve and the drain valve. These components can wear out over time, causing leaks.
  2. Tank: Corrosion inside the tank can create holes that allow water to seep out. Inspect the base of the water heater for any pooling water.
  3. Connections: Loose or faulty connections at the top of the tank can lead to leaks. Examine the inlet and outlet pipes, as well as any fittings.
  4. Anode Rod: A deteriorated anode rod can impact the tank’s integrity and cause leaks. Although less common, this area is worth checking.

Understanding these common leak sources can help you quickly identify the issue and proceed with the necessary steps for repair or replacement.

Initial Steps to Take

Once you’ve identified a potential leak, taking immediate action is crucial. Here are the steps to follow:

  1. Inspect the Area: Carefully check all around the water heater to locate the source of the leak. Be thorough to avoid missing any critical spots.
  2. Contain the Leak: Use towels or a small bucket to contain the leaking water and prevent it from spreading.
  3. Document the Problem: Take note of where the leak is coming from. This information will be helpful when discussing the issue with our professionals.
  4. Ensure Safety: Make sure the area around the water heater is safe. Remove any items that could be damaged by water or could cause a hazard.

These steps will help you manage the immediate situation and prepare for more detailed actions to minimize damage.

Immediate Actions to Minimize Damage

Shutting Off Water Supply

Shutting off the water supply to your water heater can prevent further leakage and reduce the risk of water damage. Follow these steps:

  1. Locate the Water Shut-Off Valve: The shut-off valve is typically found on the cold water pipe coming into the top of the water heater.
  2. Turn Off the Valve: Rotate the valve clockwise until it is fully closed. This will stop the flow of water into the tank and help contain the leak.
  3. Verify Shut-Off: Check to ensure no water is flowing into the tank. If the valve doesn’t fully close, you might need to shut off the main water supply to your home.

Cutting off the water supply quickly will help limit the extent of the damage and make it easier to manage the leak.

Turning Off the Power to the Water Heater

Turning off the power to the water heater is crucial for safety, especially if there is an electrical component involved. Here’s how to do it:

  1. Electric Water Heater: Locate the breaker panel in your home. Find the breaker labeled for the water heater and switch it to the “off” position.
  2. Gas Water Heater: Identify the gas shut-off valve near the water heater. Turn the valve to the “off” position to stop the gas flow.
  3. Ensure Power is Off: Double-check that the power or gas supply has been successfully turned off before proceeding.

Turning off the power to your water heater will help prevent potential safety hazards and allow you to address the leak safely.

Temporary Fixes for Leaks

Tools and Materials You Might Need

Having the right tools and materials on hand can help you apply a temporary fix to a water heater leak. Here are some essentials:

  • Pipe Wrench: Useful for tightening loose connections.
  • Plumber’s Tape: Helps seal threaded pipe connections to prevent leaks.
  • Rubber Patch Kit: Ideal for sealing small leaks temporarily.
  • Bucket and Towels: Assist in managing water leakage and cleanup.
  • Pipe Clamps: Secure a temporary fix on a small pipe leak.

Gathering these tools and materials can make it easier to apply a temporary fix until our professionals can provide a permanent solution.

Steps to Apply a Temporary Fix

Once you have the necessary tools and materials, follow these steps to fix the leak temporarily:

  1. Tighten Loose Connections: Use a pipe wrench to check and tighten any loose connections around the leak area.
  2. Apply Plumber’s Tape: Wrap plumber’s tape around the threaded connections to enhance the seal and prevent further leakage.
  3. Use a Rubber Patch Kit: Cut a piece of rubber patch to cover the leak. Secure it tightly with pipe clamps to ensure it stays in place.
  4. Contain the Leak: Place a bucket under the leak to catch any dripping water. Use towels to dry the surrounding area and prevent water damage.

These temporary fixes can help control the leak and prevent further damage until a professional repair is made.

Contacting Our Professionals for a Permanent Solution

When to Call in the Experts

Certain issues with a leaking water heater require the expertise of our professionals. Here’s when to call in our experts:

  1. Persistent Leaks: If the leak persists despite temporary fixes, it’s essential to seek professional help.
  2. Electrical Concerns: Water near electrical components is hazardous. Only qualified technicians should address such issues.
  3. Corrosion or Structural Damage: Visible rust or corrosion on the tank indicates a need for expert assessment and likely replacement.

Knowing when to call our professionals ensures the problem is resolved safely and effectively.

What to Expect from Our Technicians

When you contact us, here’s what you can expect from our technicians:

  1. Thorough Inspection: Our technicians will conduct a detailed inspection to identify the source and extent of the leak.
  2. Professional Repairs: Using specialized tools and expertise, they will perform reliable and long-lasting repairs.
  3. Safety Checks: Our professionals will ensure the water heater and surrounding area are safe, checking for any additional issues that could cause future problems.
  4. Clear Communication: They will explain the issue and the steps needed for repair and provide an estimate of the cost and time required.

Relying on our professional technicians ensures your water heater is repaired correctly and safely.

Conclusion

When dealing with a leaking water heater, taking swift and effective action is crucial. Identifying the source of the leak and performing temporary fixes can minimize damage and maintain safety in your home. However, permanent repairs and complex issues require professional intervention to ensure reliability and long-term functionality.

For a thorough and effective repair, trust the experts at D&F Plumbing, Heating and Cooling. Our team is equipped with the skills and experience to handle any water heater issues, ensuring your system operates seamlessly. Contact us today to schedule a leak detection in Gresham, OR, and ensure protection for your home from water damage.

Common Air Conditioning Repair Issues and How to Avoid Them

tools

Air conditioning systems are essential for maintaining comfort in your home, especially during the warmer months. However, like any mechanical system, air conditioners can experience problems that affect their performance. Understanding these common issues and knowing how to avoid them can save you time, money, and discomfort.

Understanding Common Air Conditioning Repair Issues

Identifying Signs of AC Problems

Recognizing signs of air conditioning problems early can help you address issues before they turn into costly repairs. Common symptoms include:

  1. Unusual Noises: Banging, clanking, or squealing sounds suggest mechanical issues or loose components.
  2. Poor Airflow: Weak airflow could indicate a clogged filter, ductwork issues, or a failing compressor.
  3. Warm Air: If your AC blows warm air, it may be due to a refrigerant leak or a problem with the compressor.
  4. Frequent Cycling: An AC system that turns on and off frequently might have issues with the thermostat, compressor, or electrical components.
  5. High Humidity: Your AC should regulate indoor humidity. If it fails to do so, it might need servicing.

By paying attention to these signs, you can catch minor problems before they escalate into significant repairs, ensuring your system operates efficiently.

Common Causes of AC Unit Failures

Several factors can lead to air conditioning unit failures. Understanding these can help in preventing them:

  1. Lack of Maintenance: Skipping routine maintenance leads to various issues, including reduced efficiency and increased wear and tear.
  2. Dirty Filters: Clogged filters restrict airflow, making the system work harder and leading to potential breakdowns.
  3. Refrigerant Leaks: Low refrigerant levels cause the system to lose cooling power and can damage the compressor.
  4. Electrical Problems: Faulty wiring or worn electrical components can cause the system to malfunction or fail entirely.
  5. Frozen Evaporator Coils: Poor airflow or refrigerant issues can cause the coils to freeze, impacting system performance.
  6. Thermostat Issues: A malfunctioning thermostat can lead to incorrect temperature readings and improper system operation.

By knowing these common causes, you can take steps to prevent them and keep your air conditioning system in good working order.

Preventative Maintenance Tips

Routine Checks You Can Perform

Performing regular maintenance checks can significantly extend the lifespan of your air conditioning system and prevent unexpected repairs. Here are some routine checks you can do:

  1. Change Air Filters: Replace air filters every 1-3 months to ensure proper airflow and efficiency.
  2. Clean Coils: Keep the evaporator and condenser coils clean to prevent buildup that can reduce efficiency.
  3. Inspect Ductwork: Regularly examine ductwork for leaks or obstructions that could impede airflow.
  4. Clear Debris: Ensure the area around the outdoor unit is free of leaves, dirt, and other debris to maintain optimal airflow.
  5. Check Thermostat Settings: Make sure your thermostat is set correctly and functioning properly.

Performing these simple tasks can keep your system running smoothly, improve efficiency, and prevent many common issues.

Importance of Regular Professional Inspections

While routine checks are essential, professional inspections play a crucial role in maintaining your air conditioning system. Our professionals have the expertise and tools to identify and fix potential problems that might be overlooked. During a professional inspection, technicians will:

  1. Check Refrigerant Levels: Ensuring the correct amount of refrigerant is crucial for optimal cooling.
  2. Inspect Electrical Components: Our technicians will examine and replace any worn or faulty electrical parts.
  3. Lubricate Moving Parts: Proper lubrication reduces friction and wear on moving parts, extending their lifespan.
  4. Calibrate Thermostat: Checking and calibrating the thermostat ensures accurate temperature control.
  5. Evaluate Overall System Performance: Comprehensive evaluations can identify inefficiencies and areas needing attention.

Regular professional inspections can prevent major breakdowns, improve system efficiency, and give you peace of mind knowing your AC unit is in top condition.

DIY Troubleshooting Steps

Basic Fixes for Common Problems

Some air conditioning issues can be resolved with basic troubleshooting steps. Here are a few common problems and simple fixes:

  1. Unit Not Turning On: Check the thermostat settings to ensure it is set to “cool” and the temperature is set lower than the current room temperature. Verify that the circuit breaker hasn’t tripped.
  2. Poor Airflow: Replace a dirty air filter, and check if any vents are blocked or closed.
  3. AC Blowing Warm Air: Confirm that the thermostat is set properly. Check the outside unit for debris and clear it away.
  4. Strange Noises: Loose parts or debris in the unit can cause strange sounds. Turn off the unit and inspect for these issues, then remove any obstructions found.

While these basic fixes might resolve minor issues, more complex problems should be handled by our professionals to ensure they are addressed safely and effectively.

When to Call Our Professionals

Certain issues require the expertise and tools of our professionals. It’s important to know when it’s time to call in experts. Here are situations when professional help is needed:

  1. Persistent Problems: If basic troubleshooting doesn’t solve the issue, the problem might be more serious.
  2. Electrical Issues: Problems like frequent tripping of the circuit breaker or faulty wiring need professional attention to avoid the risk of electrical fires.
  3. Refrigerant Leaks: Only certified technicians can handle refrigerants safely and ensure the AC unit is properly recharged.
  4. Unusual Noises Persist: Continuous banging, clanking, or other unusual noises suggest deeper mechanical issues.

Let our professionals handle these repairs to ensure your air conditioning system is fixed correctly and safely.

Long-Term Care and Maintenance Plans

Benefits of Maintenance Plans

Investing in a maintenance plan has numerous benefits for your air conditioning system. Here’s why it’s a good idea:

  1. Extended Lifespan: Regular maintenance prevents wear and tear, extending the life of your AC unit.
  2. Improved Efficiency: Well-maintained systems run more efficiently, reducing energy consumption and lowering utility bills.
  3. Preventive Care: Routine check-ups catch minor issues before they become major problems, preventing costly repairs.
  4. Priority Service: Many maintenance plans offer priority service, ensuring prompt attention to your needs.

By opting for a maintenance plan, you gain peace of mind knowing your system is in top condition and ready to handle the demands of any season.

Selecting the Right Plan for Your AC System

Choosing the right maintenance plan involves considering your system’s needs and your budget. Here are steps to help you select the best plan:

  1. Assess Your Needs: Determine how often you need maintenance based on your system’s age and usage.
  2. Review Plan Options: Compare different plans offered by service providers, focusing on what each includes.
  3. Consider Cost: Balance the cost of the plan with the benefits it provides. Investing in a slightly more expensive plan can save money in the long run through improved efficiency and fewer repairs.
  4. Read the Fine Print: Ensure you understand what is covered and any potential additional costs.

Selecting the right maintenance plan ensures your air conditioning system receives the care it needs for optimal performance and longevity.

Conclusion

Air conditioning repair is an important aspect of maintaining a comfortable and efficient home. By identifying common issues, performing routine checks, and knowing when to call our professionals, you can keep your system in good working order. Preventative measures and long-term maintenance plans play a crucial role in preventing unexpected breakdowns and costly repairs.

For expert AC repair in Forest Grove, OR, trust the experienced team at D&F Plumbing, Heating and Cooling. Our professionals are dedicated to providing high-quality service to ensure your home remains comfortable year-round. Schedule your consultation with us today to keep your air conditioning system running smoothly.

How to Choose the Right AC Installation Service for Your Home

ac unit

Choosing the right AC installation service for your home is crucial to ensure comfort and efficiency. With a lot of options available, making the right choice can seem overwhelming. However, by evaluating your needs and understanding what to look for in a service provider, you can make an informed decision.

Understanding Your AC Needs

Assessing Your Home’s Cooling Requirements

To choose the right AC installation, start by assessing your home’s cooling needs. Consider factors like the size of your home, the number of rooms, and your cooling preferences. A larger home may require a more powerful system, while a smaller living space might need a less robust unit.

Additionally, think about the layout and insulation of your home. Homes with poor insulation or multiple floors may need systems with higher efficiency or additional units. Seasonal temperature variations in your area can also influence your needs. Understanding these requirements will help you select an AC system that provides optimal comfort and efficiency.

Different Types of AC Systems

There are several types of AC systems to choose from, each with its pros and cons:

  1. Central Air Conditioning: This system is ideal for whole-home cooling. It uses ductwork to distribute cool air throughout your home. Central AC systems are efficient but can be more expensive to install.
  2. Ductless Mini-Split Systems: These units are suitable for individual rooms or zones. They are easy to install and offer flexibility but might not be as effective for larger homes.
  3. Window Units: These are best for cooling single rooms. They are affordable and easy to install but can be noisy and less efficient for larger spaces.
  4. Portable Air Conditioners: These units are mobile and can be moved from room to room. They are convenient but generally less powerful and less efficient than other options.

Understanding the different types of AC systems will help you make an informed decision that matches your home’s cooling needs.

Evaluating Potential AC Installation Services

Checking Credentials and Certifications

When evaluating AC installation services, it’s crucial to check credentials and certifications. Ensure the company has proper licensing, which guarantees that it meets industry standards. Credentials such as NATE (North American Technician Excellence) certification indicate that the technicians are well-trained and qualified.

Additionally, verify that the company has insurance coverage. This protects you from potential liabilities in case of accidents or damages during installation. Certified professionals provide peace of mind and assurance that the job will be done correctly.

Reading Reviews and Testimonials

Reading reviews and testimonials is an effective way to gauge the reliability of an AC installation service. Look for feedback on the company’s website, social media pages, and third-party review platforms. Positive reviews often highlight timely service, professionalism, and quality work. Pay attention to recurring negative comments, as they might indicate common issues with the service.

Testimonials from previous customers provide insights into their experiences. They can reveal the company’s strengths and highlight areas where they might fall short. Choosing a service with a solid reputation and positive reviews increases the likelihood of a successful installation.

Comparing Service Offerings

Comparing service offerings helps you identify the best AC installation provider for your needs. Look at the range of services provided, including installation, maintenance, and repair. A comprehensive service package indicates that the company can handle all aspects of your AC system’s lifecycle.

Consider the level of customer support offered. Companies that provide emergency services, regular maintenance plans, and responsive customer care show a commitment to their clients. Also, compare pricing and ensure that it aligns with the quality of service provided. By evaluating multiple options, you can choose a service that offers the best value and meets your specific requirements.

Important Questions to Ask

Experience and Expertise

When selecting an AC installation service, asking about experience and expertise is crucial. You want a company that has a proven track record in installing various types of AC systems. Ask how long the company has been in business and if they have experience with your specific AC type. Experienced professionals are more likely to handle unforeseen issues and ensure the installation is done correctly.

Inquire about the qualifications of the technicians who will perform the installation. Look for certifications and ongoing training programs they participate in. Experienced and knowledgeable technicians can offer solutions tailored to your home’s needs and provide insights on maintaining your AC system.

Installation Process and Timeline

Understanding the installation process and timeline helps you plan better. Ask the service provider to explain each step of the installation process. Knowing what’s involved helps set expectations and ensures there are no surprises.

Inquire about the estimated timeline for the project. Knowing how long the installation will take can help you manage your schedule. Also, ask if there will be any disruptions to your daily routine and how they mitigate those. A well-organized installation process minimizes inconvenience and ensures a smooth experience.

Warranties and Guarantees

Warranties and guarantees are important factors to consider. Ask the service provider what warranties they offer on both the equipment and labor. A good warranty indicates that the company stands behind its work and the quality of its products.

Inquire about any service guarantees they provide. This can include follow-up visits to ensure the AC system is working correctly after installation. Knowing that the service provider will address any post-installation issues offers peace of mind. Reliable warranties and guarantees are essential for long-term satisfaction with your new AC system.

Benefits of Professional Installation

Ensuring Proper Installation

Professional AC installation ensures that your system is installed correctly and operates efficiently. Our technicians adhere to industry standards and best practices, reducing the risk of installation errors. Proper installation prevents potential issues like leaks, poor cooling performance, and increased energy consumption. Ensuring every component is correctly positioned and connected leads to a system that runs smoothly and reliably.

Improving System Efficiency

A professionally installed AC system operates at its highest efficiency, providing optimal cooling while minimizing energy costs. Our professionals ensure that the system is appropriately sized for your home, preventing the inefficiencies that come from an oversized or undersized unit. Efficient systems not only save on energy bills but also reduce wear and tear, extending the life of your AC unit.

Regular maintenance provided by a professional service can further enhance efficiency. Scheduling routine check-ups ensures your system remains in top condition, addressing minor issues before they become significant problems.

Long-Term Support and Maintenance

Professional installation services often include long-term support and maintenance plans. This ongoing support ensures your AC system continues to operate effectively throughout its lifespan. Our technicians can identify potential issues early and perform preventive maintenance to avoid costly repairs.

Having a reliable maintenance plan means you’re less likely to experience unexpected breakdowns, ensuring consistent comfort in your home. Long-term support provides peace of mind and helps you get the most out of your AC system.

Conclusion

Choosing the right AC installation service is essential for the comfort and efficiency of your home. By understanding your cooling needs and thoroughly evaluating potential service providers, you can make an informed decision. Asking key questions about experience, installation processes, and warranties ensures you select a reliable service. Professional installation offers numerous benefits, including proper system setup, enhanced efficiency, and long-term support.

For expert AC installation and maintenance, contact D&F Plumbing, Heating and Cooling. Our professionals are dedicated to providing top-quality service to keep your home comfortable year-round. Schedule your consultation with us today to ensure a successful AC installation in Wilsonville, OR.

The Benefits of Mini Split Heat Pumps for Room-by-Room Temperature Control

heat pump

Maintaining a comfortable indoor temperature can be challenging, especially when different rooms require different levels of heating or cooling. Mini split heat pumps provide an ideal solution for room-by-room temperature control, offering both versatility and efficiency. These systems are increasingly popular due to their ability to deliver targeted comfort where needed most.

Understanding Mini Split Heat Pumps

Components and Functionality

Mini split heat pumps are designed to provide efficient heating and cooling for individual rooms. The system is composed of two main parts: an indoor air-handling unit and an outdoor compressor. The indoor unit mounts on a wall and is connected to the outdoor unit via refrigerant lines.

The indoor unit delivers conditioned air directly into the room, while the outdoor compressor cycles refrigerant between the two units to transfer heat. In cooling mode, the system removes heat from the indoor air and releases it outside. In heating mode, it extracts heat from the outdoor air and brings it indoors, even in cold weather.

This split design allows the system to operate without ductwork, reducing potential energy losses and simplifying installation. Each indoor unit operates independently, giving you control over the temperature in specific rooms.

How They Differ from Traditional Systems

Mini split heat pumps offer several advantages over traditional HVAC systems:

  1. No Ductwork Required: Unlike central air conditioning systems that use ductwork to distribute air, mini splits deliver air directly to the room, reducing energy loss.
  2. Independent Zone Control: Traditional systems often cool or heat the entire home uniformly, while mini split systems allow for individual room control.
  3. Compact Design: The indoor units are compact and can be installed in various locations, making them versatile and less obtrusive.
  4. Energy Efficiency: Since there’s no ductwork, energy loss is minimized, enhancing overall efficiency.

These differences make mini split heat pumps a viable option for homes lacking existing ductwork or for anyone seeking improved room-by-room temperature control.

Advantages of Room-by-Room Temperature Control

Customizable Comfort

One of the biggest benefits of mini split heat pumps is the ability to customize comfort in each room. This system allows each room to have its own thermostat, so you can set different temperatures according to your needs. Here are some specific advantages:

  1. Personalized Settings: Each family member can adjust the temperature to their liking in their own space.
  2. Improved Sleep Quality: Bedrooms can be set to cooler temperatures at night, contributing to better sleep.
  3. Flexibility: Different rooms can be adjusted to different temperatures depending on how they are used throughout the day.

Having control over the temperature in each room ensures that everyone in the household stays comfortable, regardless of their preferences.

Energy Efficiency

Room-by-room temperature control isn’t just about comfort—it also offers substantial energy efficiency benefits. By heating and cooling only the rooms you’re using, you can significantly reduce your energy consumption. Here’s how mini split heat pumps achieve this:

  1. Reduced Waste: Traditional systems can waste energy by heating or cooling unused rooms. Mini splits eliminate this by focusing on occupied spaces.
  2. Zoned Heating and Cooling: This targeted approach ensures that no energy is wasted on rooms that don’t need conditioning.
  3. Energy-Saving Modes: Many mini split systems come with energy-saving features, such as programmable timers and eco-modes.

By using energy more efficiently, mini split heat pumps can help lower your utility bills while reducing your overall energy footprint. This makes them a sustainable and cost-effective choice for home comfort.

Installation and Maintenance Considerations

Professional Installation Process

Installing mini split heat pumps requires professional expertise to ensure the system functions correctly and efficiently. Here’s what to expect from the professional installation process:

  1. Site Assessment: Our professionals will assess your home to determine the best locations for the indoor and outdoor units, ensuring optimal performance.
  2. Mounting the Units: The indoor air-handling units are securely mounted on the walls, and the outdoor compressor is installed in a suitable spot outside.
  3. Connecting the Units: Refrigerant lines, electrical wiring, and a condensate drain line are connected between the indoor and outdoor units. Proper connections are crucial for the system’s reliability.
  4. Testing and Calibration: Once installed, the system is thoroughly tested and calibrated to ensure it operates at peak efficiency.

A professional installation process ensures your mini split heat pump system is set up correctly, preventing potential issues down the line.

Maintenance Tips for Longevity

Regular maintenance is essential to keep your mini split heat pump system running efficiently. Here are some tips to maximize its lifespan:

  1. Clean the Filters: Dirty filters reduce airflow and efficiency. Clean or replace them every few months.
  2. Inspect the Outdoor Unit: Ensure the outdoor compressor is clear of debris and vegetation. This helps maintain optimal airflow and performance.
  3. Check Refrigerant Levels: Low refrigerant can impede the system’s efficiency. Have a professional check and refill refrigerant as needed.
  4. Routine Professional Maintenance: Schedule annual check-ups with our professionals to inspect the system, address any issues, and perform necessary tune-ups.

Following these maintenance tips can help you avoid costly repairs and extend the life of your mini split heat pump system.

Why Choose Us for Your Installation

Our Expertise and Services

We offer comprehensive services for installing mini split heat pumps. Our team of experienced professionals is well-versed in the latest technologies and best practices. Here’s why you should choose us:

  1. Expertise: Our professionals have extensive training and experience in installing a wide range of HVAC systems, including mini split heat pumps.
  2. Comprehensive Services: We provide everything from initial site assessment and installation to routine maintenance and emergency repairs.
  3. Quality Assurance: Our work adheres to the highest standards, ensuring the safety and efficiency of your system.

Choosing us ensures you receive top-notch service and a reliable mini split heat pump system.

How Our Technicians Ensure Quality Installation

Our technicians follow a meticulous process to ensure your mini split heat pump system is installed to the highest standards. Here’s how they do it:

  1. Thorough Planning: We start with a detailed assessment of your home to determine the best installation plan tailored to your needs.
  2. Precision Installation: Our technicians take care to install each component precisely, ensuring all connections are secure and the units are properly mounted.
  3. System Testing: After installation, we rigorously test the system to make sure it operates at peak efficiency and addresses any potential issues immediately.
  4. Detailed Walkthrough: Before finishing the job, our technicians provide a comprehensive walkthrough, explaining how to operate the system and perform basic maintenance.

With us, you can trust our technicians to deliver a flawless installation that ensures long-term comfort and efficiency.

Conclusion

Mini split heat pumps offer numerous benefits for room-by-room temperature control. From their customizable comfort settings to their energy efficiency, these systems are a versatile and practical choice for any home. Proper installation and regular maintenance are crucial to maximizing their performance and longevity.

When you choose D&F Plumbing, Heating and Cooling for your needs regarding mini split heat pumps in Lake Oswego, OR, you’re opting for quality, expertise, and peace of mind. Our experienced professionals are dedicated to providing top-quality service, ensuring your system operates flawlessly. Contact us today to schedule your installation and take the first step toward a more comfortable and efficient home.